CLICK HERE FOR FREE BLOGGER TEMPLATES, LINK BUTTONS AND MORE! »

Sunday, September 25, 2011

Challenge Yourself Monday

Hi Everyone!  Brenda here with Challenge Yourself Monday.  I've decided to use a beach theme for the challenge today.  Here is the 2 page layout I created.

First Page


Second Page

All cardstock is Bazzill.  I used A Child's Year for the beach umbrella (cut at a height of 3 1/2 inches), Simply Charmed for the title Life's A Beach (cut at a height of 3 1/2 inches) and Life's a Beach to cut the pails (I used my Gypsy to weld 3 of the borders together, cut at a height of 2 3/4 inches).  Here is a shot of my Gypsy screen.


I had fun making this layout.  What will you come up with for the beach theme?

Friday, September 23, 2011

Imagine This Friday Challenge!!

Hi, Adele here to challenge you this Friday
For this weeks Imagine this Friday Challenge
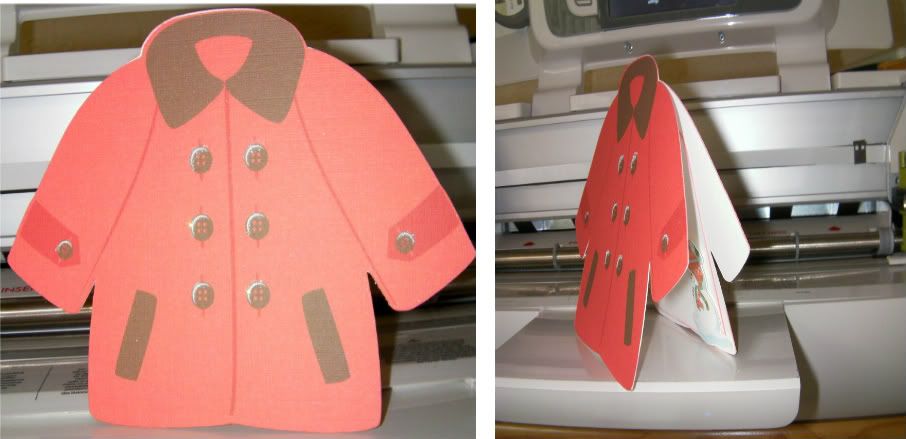
I made this Christmas card using Snow Angel & a built in shape, it's quick and easy and really cute !!


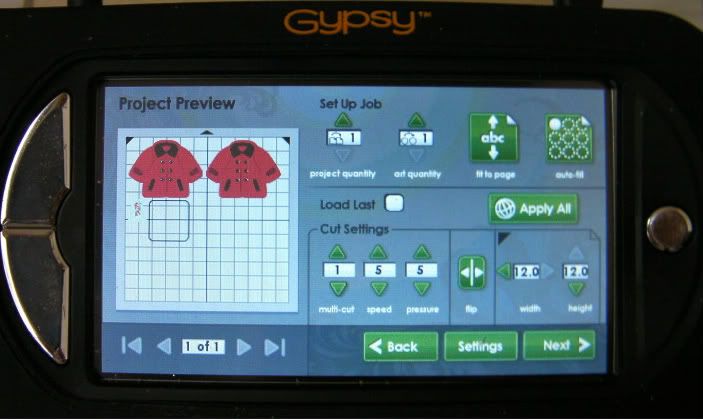
Snow Angel : Red Coat cut @ 4" one flipped for joining
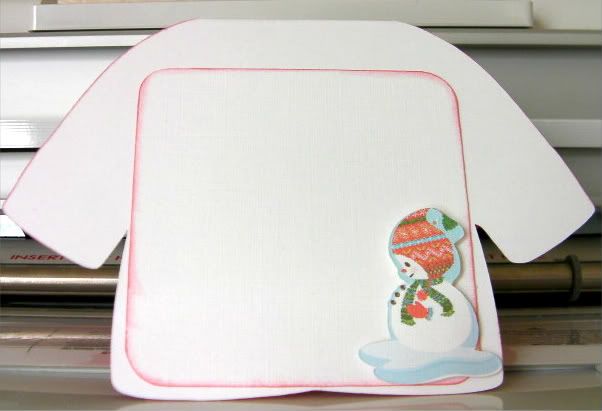
Snowman image cut @ 1.5" for decorating the insert mat
Built in shape : Rounded square cut @ 3" for the insert mat
Sakura Gel Pen & Ultra fine iridescent glitter for the buttons
Super simple but really cute !!

Your challenge is to use any Image doubled up to make the base of your card

TFL & have a great crafty day
Hugs
Adele

Tuesday, September 20, 2011

Halloween Mini Card Series

 is the second week of my Halloween Mini Card Series, this card was very easy to assemble. I hope you all are enjoying my creations as much as I am enjoying creating them.


Card 2


Recipe:
Embellishments-Spare parts bottle caps and epoxy stickers
Punch- Martha Stewart Spider web punch
Papers-Ghost & Goblins Matstack & Cardstock pack
Ink- Colorbox Spooktacular pigment ink.

Monday, September 19, 2011

Challenge Yourself Monday

Good Morning to everyone, I hope your weekend went well.  I had a very busy one but was able to create this challenge project for you all today.  I am getting motivated to try to get back on my diet so I can live a bit healthier lifestyle.  I was on Weight Watchers awhile ago and they stressed to write anything you eat, no matter how small or large,  down so you can see what you are eating through out your day.  It does amaze you if you do it for everything you put in your mouth.  For my challenge today I decided to alter
 a composition book for a diet journal. This was a challenge to me cause I rarely alter things.  I think it turned out pretty nice and looks alot better then the black comp book.  LOL  Here's my project.  
I will have the cut sizes at the bottom of post.  For your Challenge I challenge you to make anything you want, like a card, scrapbook page or alter something and add ANY FRUIT Die Cut from your favorite cartridge.                                 
FROM THIS


TO THIS

THIS IS THE BACK OF THE BOOK.
                                        
 The Sizes and carts used are:

The covering is  6 5/8"x 9 3/4"  light weight pattern paper by MY MINDS EYE
Apple with swirl   (Celebrate with a Flourish)   3"
Journal        ( Graphically Speaking Page 51)    1/2"   make sure you don't use RDS
Diet            Is some white chipboard letters in my stash, but your favorite font could be used
Banana       (Preserves)  2 1/2"
Grapes       (Preserves)  3 1/2"
I used an apple brad for my dot on the word journal by recollections.

OK GANG its your turn.  Get out your thinking caps and get crafting something with a fruit as your main image(s).  HAVE FUN>  I had a lot of  Fun with this Challenge and Hope I can really use it to help me with my weight Loss Goal. 

TAMMY IRELAND


Friday, September 16, 2011

Imagine That Friday!!

Hello everyone!  Happy Friday to you. :)   I am very excited to be here today to share a really easy and fun project I made.   Lately I have been playing around with my Imagine and creating my own pattern paper, and  I am totally loving it!  The possibilities are absolutely endless!

With Fall right around the corner, I can't help but think of Halloween... it is one of my favorite days. I know I will be having to make some little favors for my kids' school parties, so I thought I'd get a jump start on that with today's project.  I decided to make a cute little pillow box to put a few goodies in.... I think the kids will enjoy these. (I will be making a variety of boxes to keep them interesting!) 


In order to create this box, I first started out by picking an image I wanted for my background (designer) paper.  I found some really fun images on the October 31st cartridge, but ended up choosing the black cat in the end.  Once I had the image I wanted, I went to the mat preview screen and changed my paper size to 8" by 9", then I chose the auto fill feature.  Here is what it looked like:


Before printing your paper, BE SURE to go to the Settings section and change your setting to PRINT ONLY!!  You will now have  own personalized pattern paper.


Cool eh??  Ok, now that you have printed your paper, you need to go back and change your settings to CUT ONLY to cut your pillow box.  There are several different pillow boxes on the Cricut cartridges, but I went with the one on the Enjoy The Seasons Imagine cartridge.  The reason I chose this one is that it is plain, with no cutouts, so there is no need to use a Gypsy to hide any cut lines.  I cut my pillow box at 7.9".


Now you will need to score the box and add some good adhesive to assemble. This is what the box will look like once it is all together:

At this point, just add any fun embellishments you would like.  Super Super easy!!

So, for today's challenge....  create you own background/printed paper using your Imagine and then incorporate it into any project of your choice!  I hope you have fun with this one.

Thanks for stopping by today,  I hope you all have a fabulous weekend! :)
Lori

Wednesday, September 14, 2011

Use Your Stash Wednesday


Hi there! Nancy here with a project made using some of my surplus of crafting supplies. I admit, I am just about as bad about collecting vinyl as I am paper! I order most of my vinyl from expressionsvinyl.com. It is the same vinyl as our Cricut vinyl, but runs about $1.89 for a 12x24 of the regular indoor vinyl. Anyway, I have a ton of it and lots of scraps. I also collect frames, glassware, mirrors, etc. to use with my vinyl. I decided I would use the Word Collage Cartridge to make a changeable seasonal wall decoration. I used an 8x8 shadowbox frame that I had in my stash and lots of vinyl scraps. I cut the whole collage in black and then added the colored pieces to highlight. I plan on making an insert for every season. This particular one is cut at 7.5 inches square, but I will probably cut the rest at 7x7 so they don't go all the way to the edge. The background paper (another scrap), is cut at 8x8. I do apologize for the glare and/or shadow you see-I just couldn't get the perfect photo in the light I had. I think I will also add a removeable accent to the outside of the frame for each season. Probably use magnets to hold it on. Hope you like it.

Tuesday, September 13, 2011

Halloween Mini Card Series

There are 6 weeks left until Halloween and I have decided to post a card each week until Halloween, which is my favorite holiday (if you consider it a holiday). I am going to try and use things that are in my stash and to make theses cards without the use of my Cricut, although I doubt that will happen. LOL! I hope you enjoy my mini card series.

Card 1 (Very Simple)


Recipe:
Designer Paper- DCWV Ghost & Goblin Matstack
Stamps- All Hollow's Eve (Recollection) Elegant Witch for the spider (Martha Stewart)
2 orange Rhinestone from Studio 18 (dollar bin)

Monday, September 12, 2011

Challenge Yourself Monday

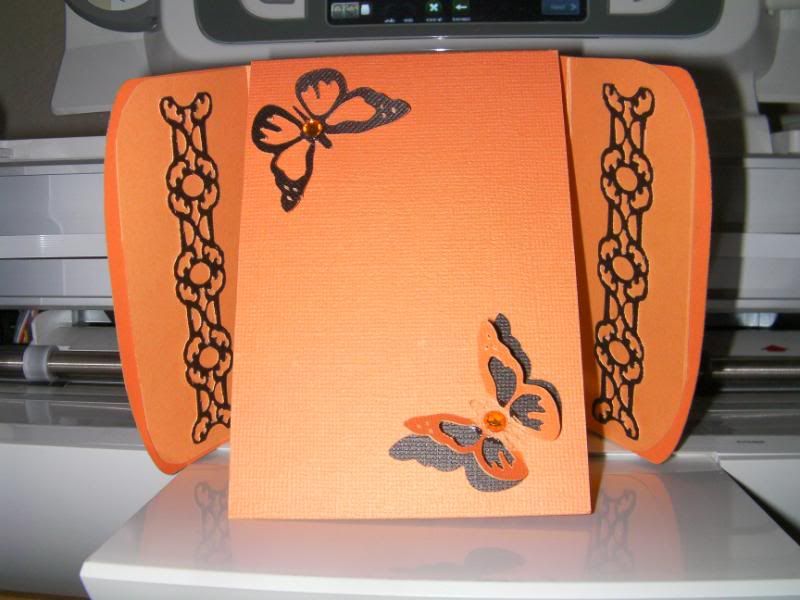
Hello, this is Rosa from Enjoying The Bug. For this week's Monday Challenge is to use a butterfly cut from any cart and create a card for someone, whether its for a birthday, just a thank you note, or even just because. With this being said below is what I came up with.....


To Make this card I used the following-
Cricut Imagine
Carts- Give A Hoot (Butterfly) and I used Imagine More Cards to fill it in.
Cardstock- Recollection and the new DCWV Harvest Matstack.
Stamp- TPC Studio "Thank You" set.


TBBM, George, Paper Lace & Gypsy


Friday, September 9, 2011

Imagine This Friday Challenge!!

Hello everyone, Adele here with this week's 
Imagine This Friday Challenge!!
Today I wanted to keep it simple and also for those that do not have an Imagine can  join in too.

My challenge for this week is to make use of any basic built in shape
(Non Imagine user's can use any shape they like)
I wanted to get a head start on some Christmas cards, so this is what I came up with ;)


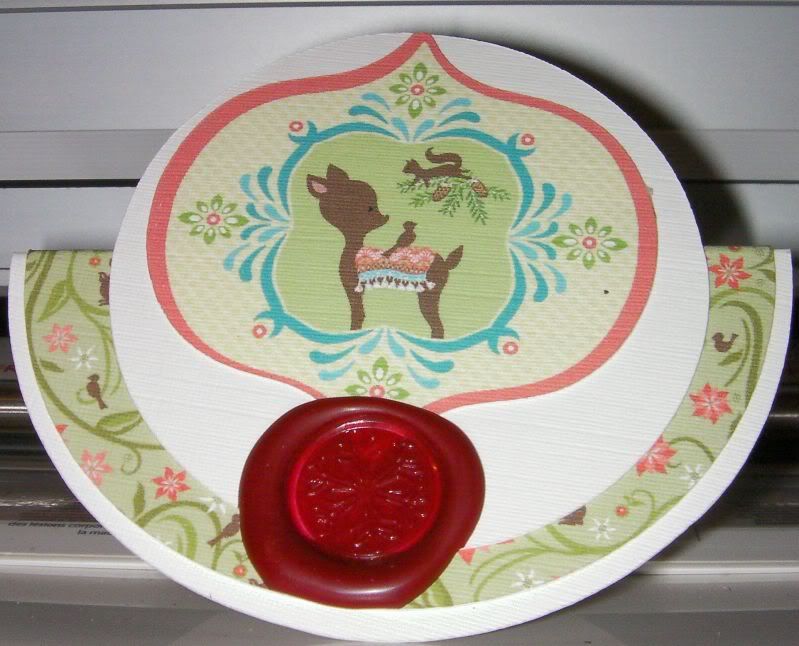
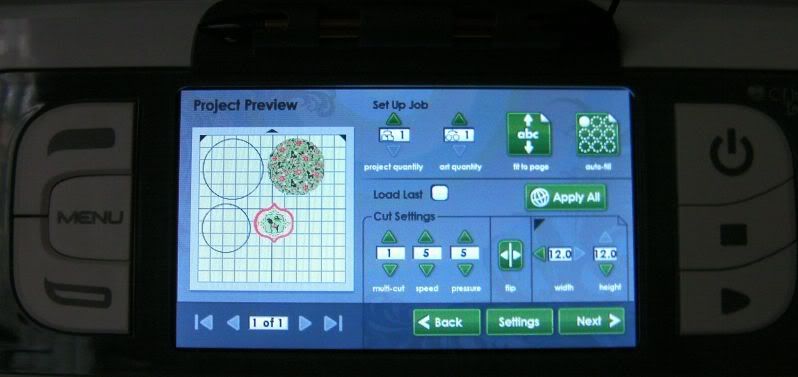
By just using 3 circle shapes and a Snow Angel Image, quick and easy :)


I cut 2 plain circles at 4" and 5"
1 patterned circle at 4.5" (Snow Angel)
The image from Snow Angel was cut at 3"

First I added the patterned paper to the largest circle, 
scored through the centre then added the smallest circle (only adhering the bottom half to the base)
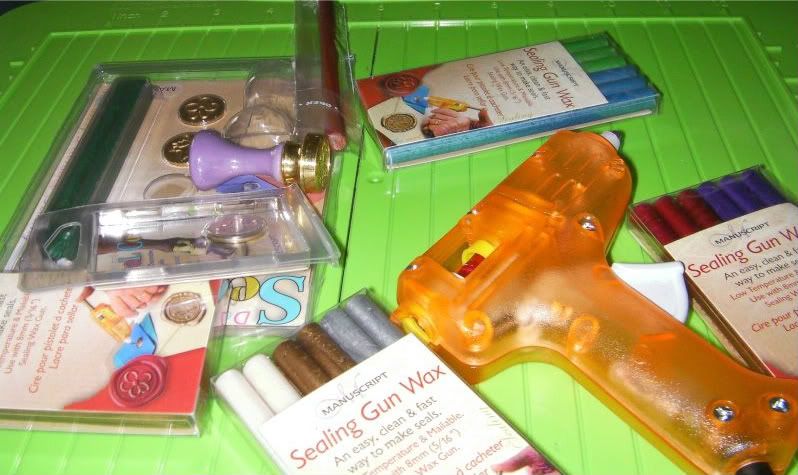
I also added a wax Christmas seal


So quick and easy to make, my next batch will have action wobbles for the Kiddies :)
I hope you can join in this challenge
Get creative but most of all
Have Fun !!


Hugs
Adele


Wednesday, September 7, 2011

Use Your Stash Wednesday

Hello -

I was supposed to have a post for Use Your Stash Wednesday, but unfortunately I had to attend my grandmother's funeral today.

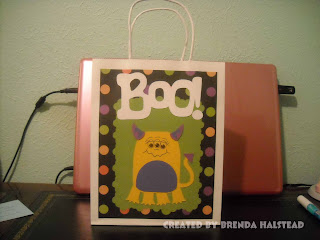
Here is a gift bag I made for a blog hop last month, which I made from my stash.  I wanted to post something, even though I didn't have time to make anything new.

Monday, September 5, 2011

Challenge Yourself Monday

Hello Rosa Here! Hope everyone is enjoying this Labor Day. Today's challenge is to create a fall or Halloween card using at least 2 of the following colors (Green, Purple, Orange, Black, Brown) and remember it must include at least one Cricut cut.

Here is what I came up with.......
Recipe:

Cricut Imagine with the Mini Monster cart. I printed and cut the monster from page 49 with all it's layers.
Papers- All the papers are from the new DCWV Ghost & Goblins Matstack.
Stamp- Martha  Stewart Craft Classic Halloween
Punch- Martha Stewart Craft  Fence Punch.
I also used my sewing machine for the stiching. And  1 googley eye.

Now it's your turn, take me up on this challenge for your chance to win this month's giveaway!!

Friday, September 2, 2011

Imagine That Friday

Welcome everyone, so glad you could stop in today. Wanted to give you a little background on myself before we begin. My name is Tammy Ireland and I'm from a small town in Southern Indiana and Ive lived in this area my entire life. I am married to my supportive hubby for 27+ yrs. I have been scrapbooking for about 5yrs now ( really since cricut came out) and I'm soooooo loving my hobby. I own the original cricut, which I still use while crafting away from home, pink E and now the E2 and an I. YES YOU CAN SAY IT, BOY THAT LADY IS OBSESSED! OK that's all I'll bore you with today. LOL
Just so you know I was going to include a video of today's post project, but last week my Imagine quit loading paper, so its on the return truck as we speak and I wasn't able to get a vid done. For my project I decided to go with a couple of Christmas Cards. I used my Snow Angel cart for both of them. I did change up some of the papers though. ENJOY!
Both cards are A2 size.  4 1/4 x 5 1/2    Sorry about the quality of my pics My camera has been doing this.
Ok sizes and such: white  A2 card, holly layer 4 x 5 1/4 printed from Snow Angel page41, Green cs ( from my scrap box) embossed layer 3 1/2 x 5    note***** I left enough room at the bottom unembossed to place my MERRY CHRISTMAS sentiment (I used a cuttlebug Christmas embossing folder) Sorry I don't have the name.
For the tree I printed all the layers separate and changed up the base to a different pattern paper from the  same cart.  The size is 4".   I used a MERRY CHRISTMAS rubber STAMP for my sentiment. I added some stickles to the tree for some Christmas bling. Gotta have bling at Christmas, RIGHT.

Here is the tree on page 22

                                                                                CARD 2

For card 2  this is a softer looking card and I love it.
White A2 size card , printed pattern paper (from snow angel, page 42)  4 1/4" x 5 1/2" ,  Flower is cut at
4 1/2"  and I changed up the colors to all pattern papers.  For the leaf I used the pattern on page 40, for the middle layer I used 39 and for the top layer I used 43.  For the center of my flower I used some MS glass beads and for my Sentiment I used my Rubber stamp again on white CS and then fussy cut it out and added it to my card.  I also add a strip of velvete ribbon on the bottom.  I did do some inking the edges on both of todays cards.

Here is the flower on page 25

OK gang that's it for today.  My challenge for you is to get your Imagines out and make a card(s) for Christmas to get a head start on the upcoming holiday season and change up your papers.  Use mainly your imagine patterns for you papers
HAVE FUN

Rosa


Thursday, September 1, 2011

This Month's Giveaway

For the month of September the giveaway will be the Once Upon A Princess Cricut cartridge.


To be eligible to win you must participate in the weeks challenges. There are 3 topics that are posted each week, Challenge Yourself Mondays, Use Your Stash Wednesday, and Imagine This Friday. You do not have to participate in each category but it does increase your chances of winning. Once you have posted your project please leave a comment with a way of being contacted. I will select an entry using random.org  from each category each week at the of the month those winners will be entered into the giveway and one winner will be selected.  I look forward to seeing what you guys create!