CLICK HERE FOR FREE BLOGGER TEMPLATES, LINK BUTTONS AND MORE! »

Thursday, December 1, 2011

Imagine This Friday

It is so cold here in Atlanta, and with all the weather changes Christmas seems closer and closer. I made a wintery card for todays post. I stepped outside of my comfort zone doing a embossed background but I love the way this card turned out. I used my Cricut Imagine and flood filled the images from Winter Frolic Cartridge.


Christmas Card 3 

Recipe
Cricut Imagine- Imagine More Cartridge and Winter Frolic Cartridge
Cardstock- Recollection
Ranger- Star Dust Stickles
Twine- Martha Stewart Baker's Twine
Stamps- Recollection and Inkadinkadoo Background stamp
Embossing Powder- American Craft Clear

Use Your Stash Wednesday

So like many of us do, we shop, shop, shop and eventually we have a bunch of crafting supplies just sitting there. Now what do we do with these supplies, use them for my wednesday challenge. For this week's challenge I used the new items that I had added to my stash a few week's ago.


Christmas Card

Recipe

Pattern Paper- DCWV Christmas & Winter Stack
Cardstock- Recollections
Snowflake- Martha Strewart Punch
Stamp- Recollection
Bling-Studio G

Hope you enjoy today's card!

I challenge you to create a wintery card using anything and everything in your stash. Have fun!


Monday, November 21, 2011

Challenge Yourself Mondays

Where has the year gone? Its already November and with Thanksgiving around the corner things have been crazy in my household and I have been neglecting my craft room, but I made sometime today to put a quick card together. Hope you enjoy!


My first Christmas Card 2011

 Recipe:
Base: 5x5 square card
Pattern Paper: DCWV The Christmas & Winter Stack
Twine: The Twinery
Ink: Stazon
Embossing Powder:American Craft
Stamps: Recollection
Now I challenge you to create a Christmas card without using your Cricut!

Friday, November 4, 2011

Imagine This Friday!

Hello everyone... it's Lori! Can you even believe it's November already?? I am kind of freaking out about it! LOL! I was in WalMart today and the entire store was decorated for Christmas AND they were playing Christmas music. CRAZY!!

I happen to really enjoy Fall and I love Thanksgiving, so it makes me sad that this time of year is really skipped over in the retail market. I don't want to think about Winter and Christmas right now.... I want to enjoy November and Thanksgiving. :) So for today's challenge, I want you to make a project for Fall or Thanksgiving using at least three different patterns from your Imagine cartridges.

Here is the card I made to share with you today:

Cartridges used:
Sophie (Circle Exclusive): leaf image
Thanksgiving: sentiment
Patterns used from: Ancestry, Audrey and Heirloom

Thanks so much for stopping by today. I hope you will be able to join in for this challenge!

Wednesday, October 26, 2011

Use Your Stash Wednesday

Hi!  Brenda here.  Sorry I'm late getting this posted, but it just hit me that today is Wednesday.  Here is the layout I did for the Use Your Stash Wednesday Challenge.


This is one of the few layouts I have done without using my Cricut.  The paper is from a paper pack I bought off of QVC, the butterfllies are Dazzles stickers, but buttons are from the 3 Birds Cute As A Button Kit and the tag used for the title is CTMH.  Will you join me in this challenge and use some items out of your stash to create something?

Monday, October 24, 2011

Challenge Yourself Monday

Hey! Im Rosa and today's monday challenge is to create a mini album using your Cricut and cartridge of choice. For my project today I used the Create A Critter cartridge.


Pumpkin Patch 2011
Front Cover 

Side View  

Side View 2

Inside Cover

Some of the Pages

Another one of the Pages

For this project I used Create a Critter for the pumpkin shape, I used my Gypsy to hide the cuts that I did not want. All the papers I used are from the new DCWV Halloween and Fall Stack, and some Kraft Cardstock. Very simple all I need now are the pictures to complete what I had imagined.. Thanks for looking, hope you guys join in on the challenge.


Thursday, October 20, 2011

Use Your Stash Wednesday

Hello everyone this is Rosa, sorry for the late post but I have been super busy with 40 invitations I been making for my friend's big birthday party. The card I am sharing with you guys was very easy to make, I hope you enjoy.

Recipe:
Cardstock- Recollections
Designer Paper- DCWV Ghost & Goblins Matstack and coordination cardstock
Adhesive- Scotch ATG and glue dots
Ink- Martha Stewart Cat eyes

Monday, October 17, 2011

Challenge Yourself Monday

Hi all, Nancy here with you today.  Just in case you don't know me, I am a huge LSU Tiger fan.  My dad graduated from there and my daughter graduated from there.  I graduated from Northwestern State here in LA, but LSU is my favorite team.  We have season tickets to watch the Tigers play and I love that we are doing so well this season.  That being said, this time of year everyone has a favorite peewee, high school, college or NFL team-even some folks like Alabama-gasp!  My challenge to you is to create a layout or a tailgate invitation using the colors of your favorite team and depicting the game, fans or tailgating activities.  You can even use this as an opportunity to scrap those Homecoming activities.  Use Sports Mania or any other cart you might have-just be sure to give us the recipe.  Happy footballing!!!


Some of these photos came from an LSU message board, Tiger Rant, from a guy named Jeff.  Don't want to get in any trouble for using his photos, so I wanted to give him credit. 

Recipe:
CM Football Additions paper pack (I am a CMC, so if you are interested in the CM additions pack, feel free to ask me about it.)
LSU ribbon from WalMart
Cuttlebug Swiss Dots embossing folder
CM Cardstock
Foam dots
CM adhesive tape
Cricut Varsity Letter, Sports Mania and Locker Talk
Most cuts at 3", "Tigers" at 2 1/2"


Hope you get some inspiration!  Let me see your team layouts!!

Thursday, October 13, 2011

Use Your Stash Wednesday

Hello my crafty friends, this Lori from got2bcrafting. I am sooo sorry that I am posting a day late.  Things are a bit crazy and hectic in my life right now and my dates got a little mixed up.  I truly apologize.  So without further ado, here is the card I made using all my old stash.


 I really had a lot fun looking through boxes and drawers that I haven't looked through in awhile.  Honestly, sometimes I forget about some of the supplies that I have.  The  solid color papers I used for the candy corns are from some OLD Sizzix adhesive backed paper packs.  These really make assembling images with layers VERY fast and easy... not sure why I haven't used them for so long.  The patterned paper in the background is from a DCWV stack from a couple of years ago, again, don't know why I haven't used it more! The ribbon and buttons used are from  WAAAAAAY back.  I tell ya, it really felt good using some of that old stash. :)  The cartridge I used was for the candy corn was Smily Cards, a free cartridge included with my Gypsy.  The cute face stamps are from none other than Peachy Keen and the sentiments are from Scrappy Moms. 

So your challenge today is:   Use Your Stash and include at least 2 different types of embellishments (ribbon, twine, buttons, chipboard, stickers etc.)  Thanks for stopping by... hope you will be able to join in on the challenge. :)

Have a CRAFTY day!
Lori

Monday, October 10, 2011

Challenge Yourself Monday

Happy Monday!  Brenda here with Challenge Yourself Monday.  The theme for today's challenge is Birthdays.  I picked this theme because Wednesday is my grandson's 4th birthday, so I wanted to make him a card.  Here is the card:


I scraplifted the card from the Cricut Create a Critter handbook.  The number 4 was cut from the Cricut American Alphabet (on the Expression 2) and all other cuts were made with the Create a Critter cartridge at a height of 6 inches.  The brown cardstock used for the tree trunk is Wausau, the blue, orange and green solid cardstock is Bazzill, the patterned cardstock is from my stash.  The stamp used for the face is from the Peachy Keen Stamps Everyday Character Face Assortment, and the birthday cake & Happy Birthday are Stampin' Up!.

Thanks for stopping by!  Do you have a birthday project you will be working on?

I think I'm going to make a gift bag with the dinosaur on it for one of my grandson's presents.

Friday, October 7, 2011

Imagine This Friday Challenge

Hi everyone :) Adele here
Welcome to Imagine This Friday Challenge
Today I wanted to make something really simple but decorative, so decided to make a Christmas decoration using the Imagine More cartridge that came with the Imagine, plus add 2 cached patterns from Snow Angel.
So here is what I made


This was really quick to make, so here is what you need to do to make your own.

Firstly select a border from the Imagine More cart, size 2 @ 2.5" and the other 2 @ 2", then using the 2 cached Snow Angel patterns, flood fill your borders.


Score your borders on every divide and through the centre of the hole to give an even accordian folded border, mine worked out at every 5/8 of an inch.


Stick both ends of each border together in relevant sizes ie. both 2.5" borders glued together to form a circle


I also used a circle punch to cut 4 circles to join the flattened circles to.


Pop the smaller circle onto the top for added dimension and there you have it...Simple :)

( To cache a pattern from a different cartridge, just select a basic shape, click the edit pencil, this brings you to the edit screen, choose your chosen pattern by holding your stylus on the pattern for a few seconds, a pop-up window will appear saying "Cache Pattern", click it and it will save it in the machine's memory and add it to the end of your next plugged in cartridge's patterns.)


I hope you enjoyed this quick project and your challenge is to make your own with any cached pattern you wish.

Have fun & happy crafting

Hugs

Adele

Sunday, September 25, 2011

Challenge Yourself Monday

Hi Everyone!  Brenda here with Challenge Yourself Monday.  I've decided to use a beach theme for the challenge today.  Here is the 2 page layout I created.

First Page


Second Page

All cardstock is Bazzill.  I used A Child's Year for the beach umbrella (cut at a height of 3 1/2 inches), Simply Charmed for the title Life's A Beach (cut at a height of 3 1/2 inches) and Life's a Beach to cut the pails (I used my Gypsy to weld 3 of the borders together, cut at a height of 2 3/4 inches).  Here is a shot of my Gypsy screen.


I had fun making this layout.  What will you come up with for the beach theme?

Friday, September 23, 2011

Imagine This Friday Challenge!!

Hi, Adele here to challenge you this Friday
For this weeks Imagine this Friday Challenge
I made this Christmas card using Snow Angel & a built in shape, it's quick and easy and really cute !!


Snow Angel : Red Coat cut @ 4" one flipped for joining
Snowman image cut @ 1.5" for decorating the insert mat
Built in shape : Rounded square cut @ 3" for the insert mat
Sakura Gel Pen & Ultra fine iridescent glitter for the buttons
Super simple but really cute !!

Your challenge is to use any Image doubled up to make the base of your card

TFL & have a great crafty day
Hugs
Adele

Tuesday, September 20, 2011

Halloween Mini Card Series

 is the second week of my Halloween Mini Card Series, this card was very easy to assemble. I hope you all are enjoying my creations as much as I am enjoying creating them.


Card 2


Recipe:
Embellishments-Spare parts bottle caps and epoxy stickers
Punch- Martha Stewart Spider web punch
Papers-Ghost & Goblins Matstack & Cardstock pack
Ink- Colorbox Spooktacular pigment ink.

Monday, September 19, 2011

Challenge Yourself Monday

Good Morning to everyone, I hope your weekend went well.  I had a very busy one but was able to create this challenge project for you all today.  I am getting motivated to try to get back on my diet so I can live a bit healthier lifestyle.  I was on Weight Watchers awhile ago and they stressed to write anything you eat, no matter how small or large,  down so you can see what you are eating through out your day.  It does amaze you if you do it for everything you put in your mouth.  For my challenge today I decided to alter
 a composition book for a diet journal. This was a challenge to me cause I rarely alter things.  I think it turned out pretty nice and looks alot better then the black comp book.  LOL  Here's my project.  
I will have the cut sizes at the bottom of post.  For your Challenge I challenge you to make anything you want, like a card, scrapbook page or alter something and add ANY FRUIT Die Cut from your favorite cartridge.                                 
FROM THIS


TO THIS

THIS IS THE BACK OF THE BOOK.
                                        
 The Sizes and carts used are:

The covering is  6 5/8"x 9 3/4"  light weight pattern paper by MY MINDS EYE
Apple with swirl   (Celebrate with a Flourish)   3"
Journal        ( Graphically Speaking Page 51)    1/2"   make sure you don't use RDS
Diet            Is some white chipboard letters in my stash, but your favorite font could be used
Banana       (Preserves)  2 1/2"
Grapes       (Preserves)  3 1/2"
I used an apple brad for my dot on the word journal by recollections.

OK GANG its your turn.  Get out your thinking caps and get crafting something with a fruit as your main image(s).  HAVE FUN>  I had a lot of  Fun with this Challenge and Hope I can really use it to help me with my weight Loss Goal. 

TAMMY IRELAND


Friday, September 16, 2011

Imagine That Friday!!

Hello everyone!  Happy Friday to you. :)   I am very excited to be here today to share a really easy and fun project I made.   Lately I have been playing around with my Imagine and creating my own pattern paper, and  I am totally loving it!  The possibilities are absolutely endless!

With Fall right around the corner, I can't help but think of Halloween... it is one of my favorite days. I know I will be having to make some little favors for my kids' school parties, so I thought I'd get a jump start on that with today's project.  I decided to make a cute little pillow box to put a few goodies in.... I think the kids will enjoy these. (I will be making a variety of boxes to keep them interesting!) 


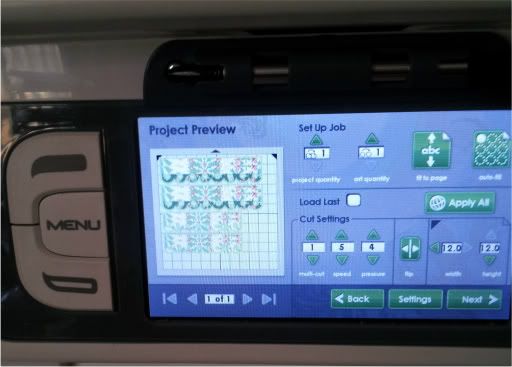
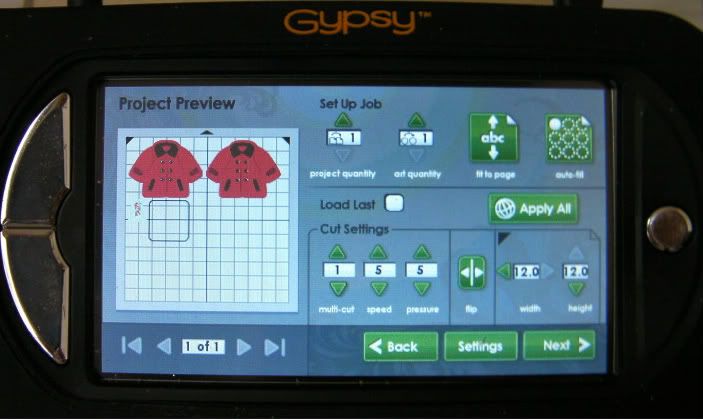
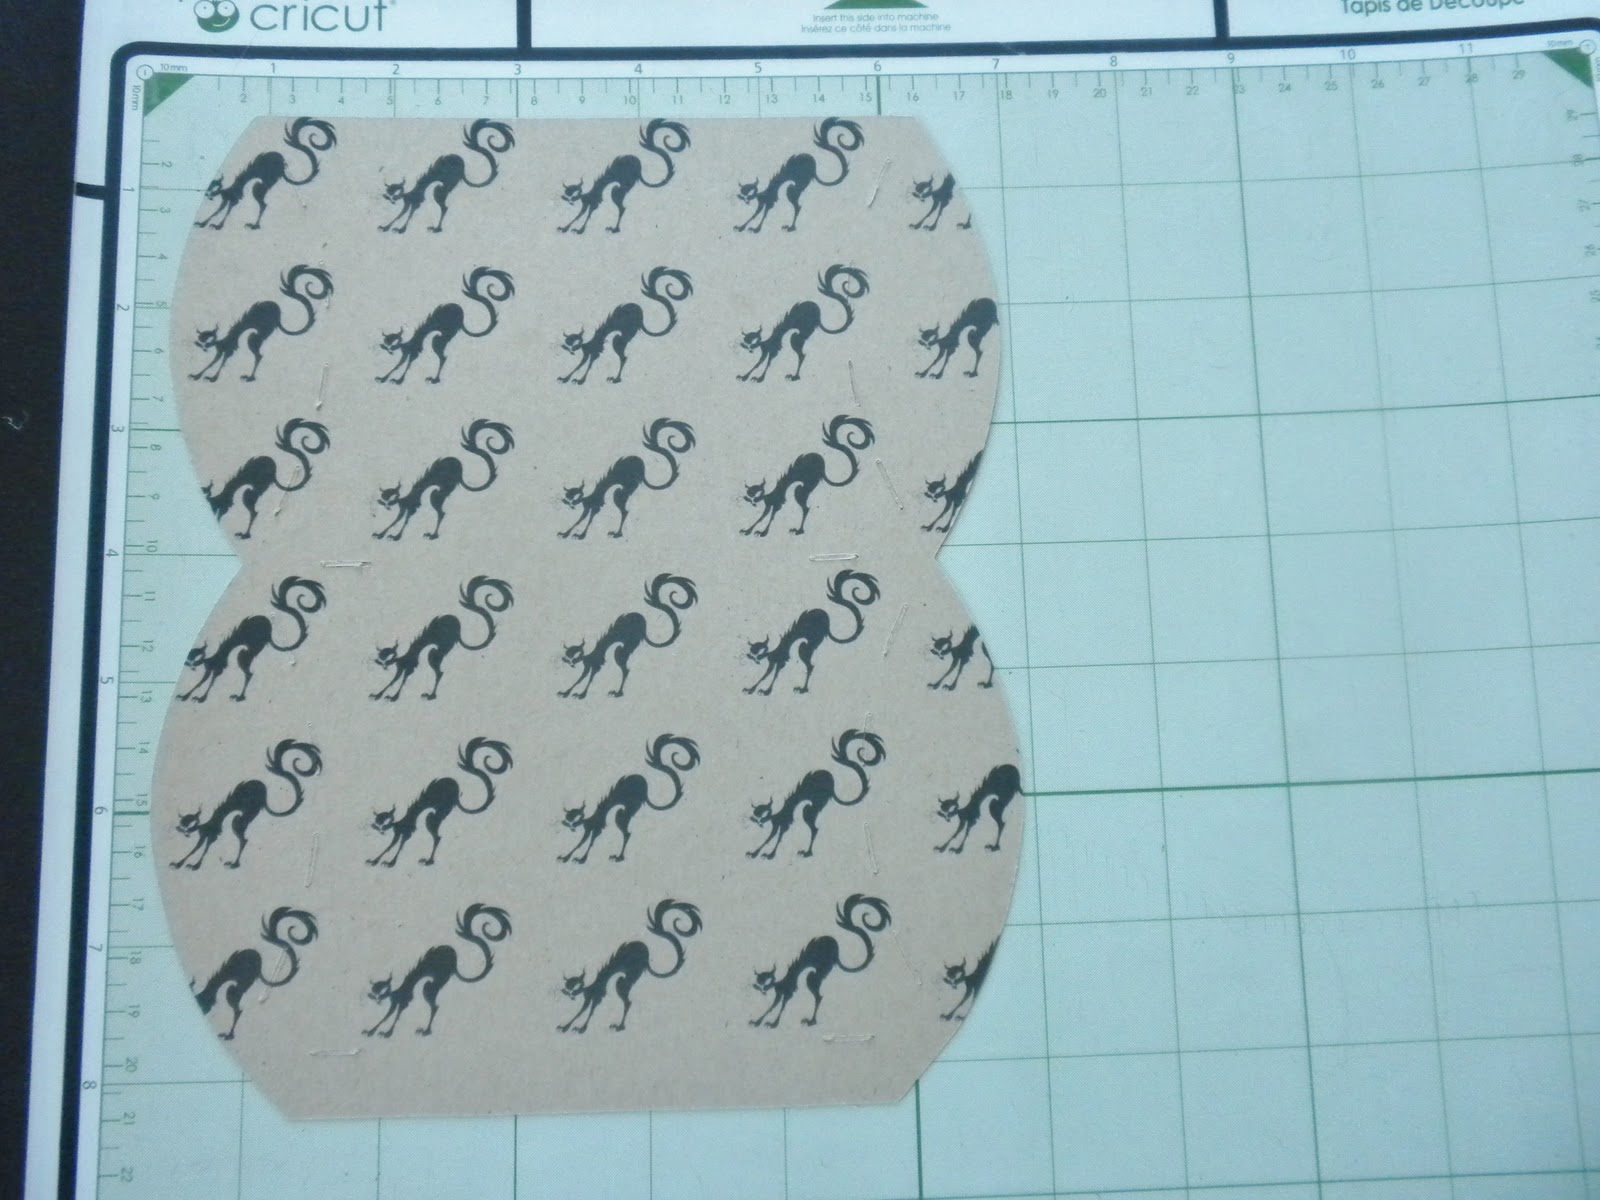
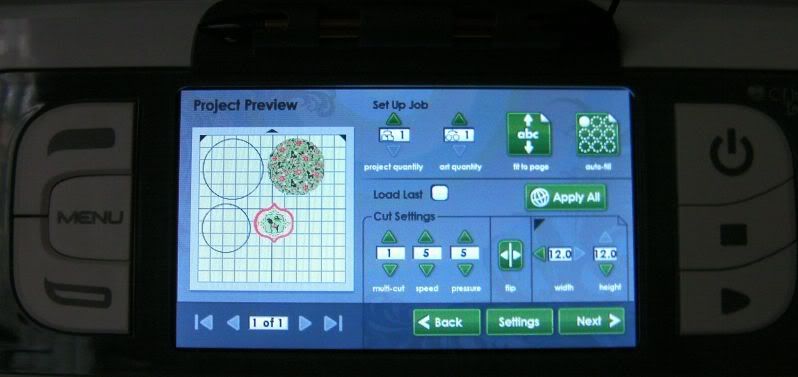
In order to create this box, I first started out by picking an image I wanted for my background (designer) paper.  I found some really fun images on the October 31st cartridge, but ended up choosing the black cat in the end.  Once I had the image I wanted, I went to the mat preview screen and changed my paper size to 8" by 9", then I chose the auto fill feature.  Here is what it looked like:


Before printing your paper, BE SURE to go to the Settings section and change your setting to PRINT ONLY!!  You will now have  own personalized pattern paper.


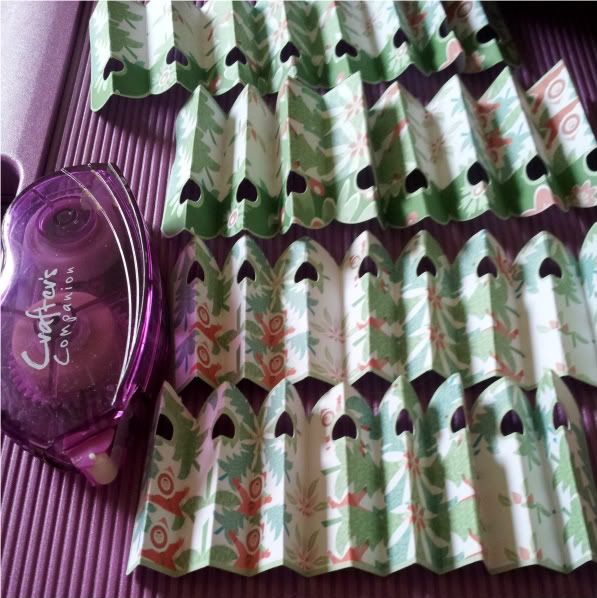
Cool eh??  Ok, now that you have printed your paper, you need to go back and change your settings to CUT ONLY to cut your pillow box.  There are several different pillow boxes on the Cricut cartridges, but I went with the one on the Enjoy The Seasons Imagine cartridge.  The reason I chose this one is that it is plain, with no cutouts, so there is no need to use a Gypsy to hide any cut lines.  I cut my pillow box at 7.9".


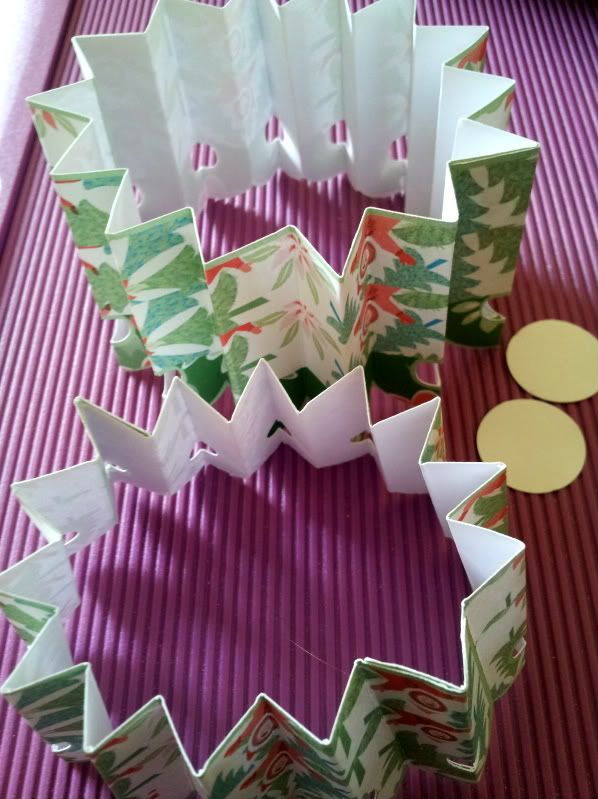
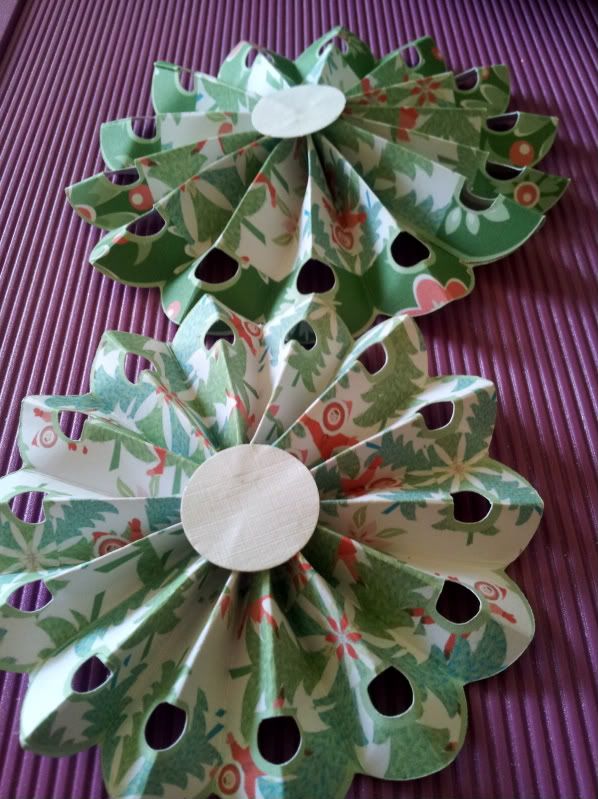
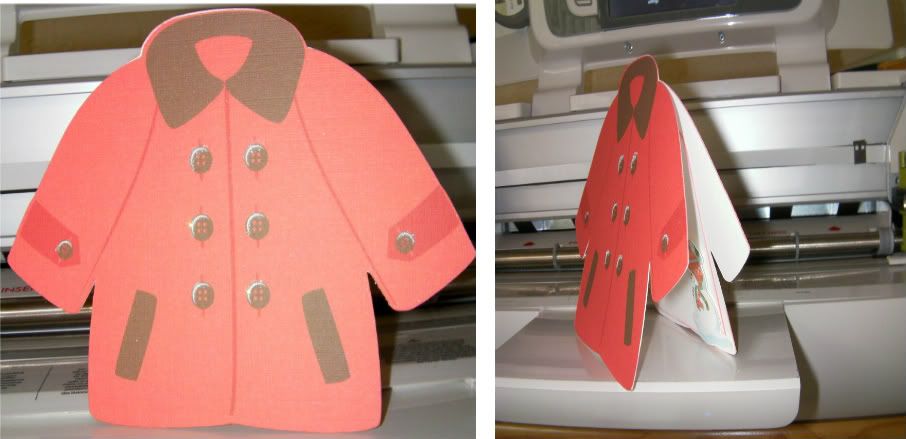
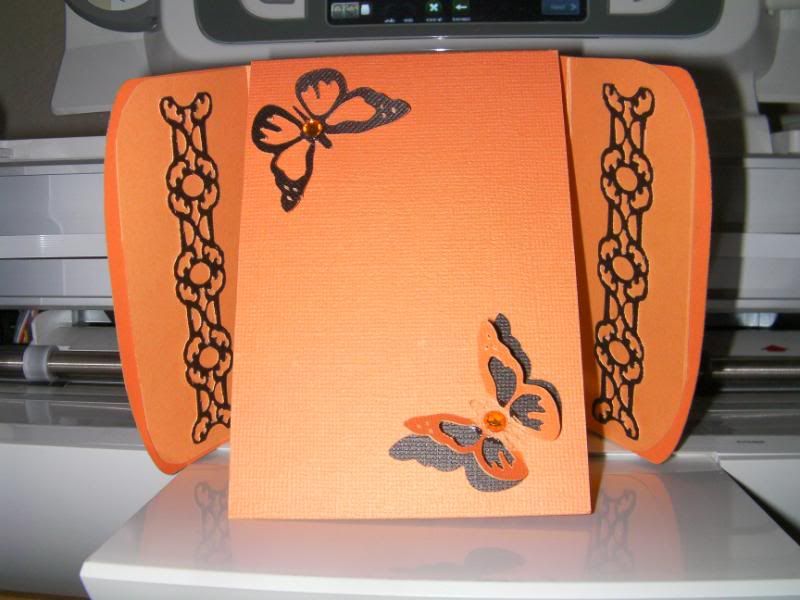
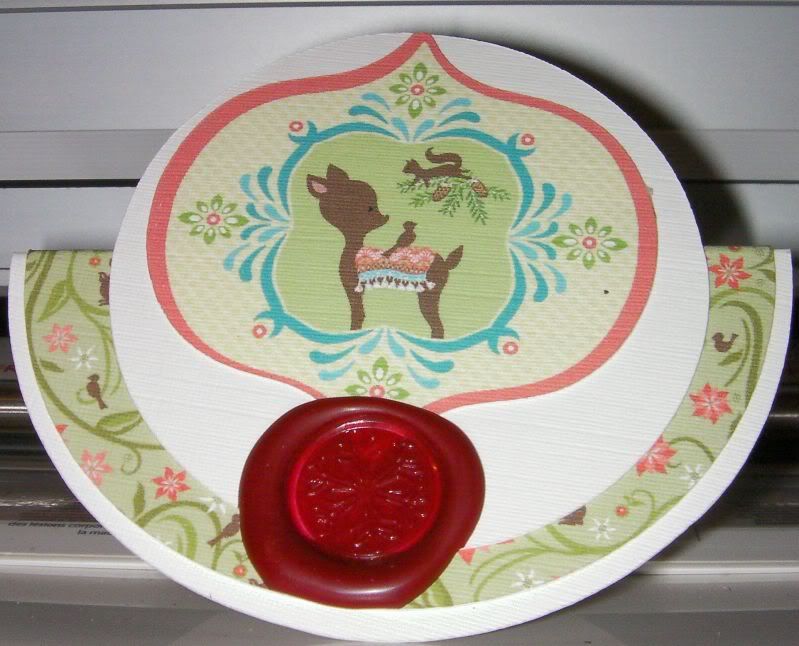
Now you will need to score the box and add some good adhesive to assemble. This is what the box will look like once it is all together:

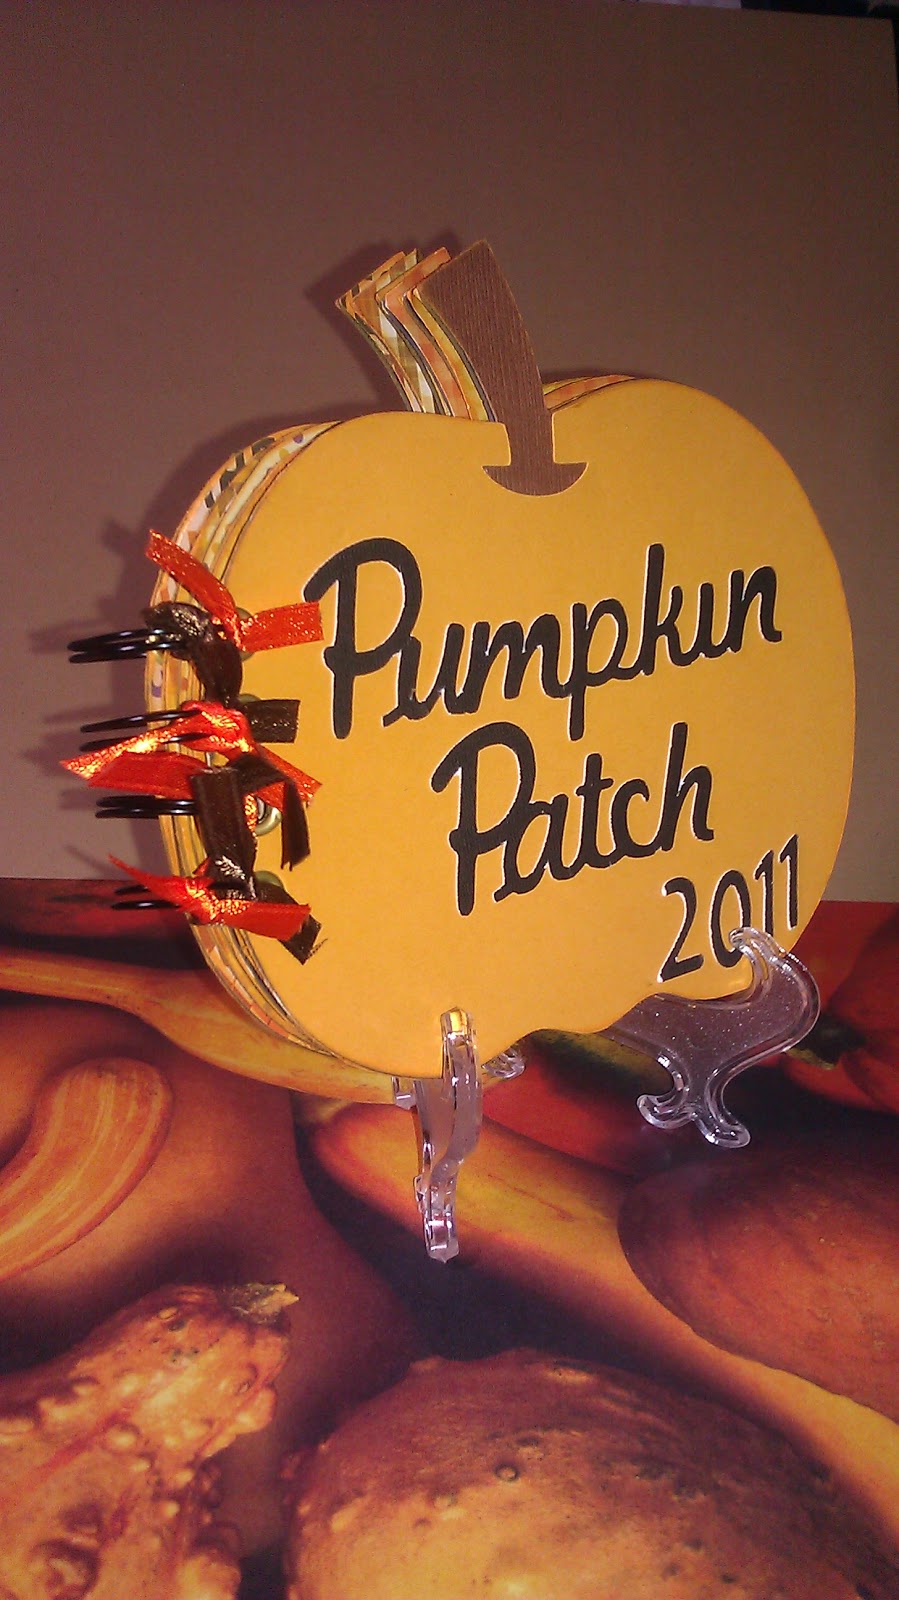
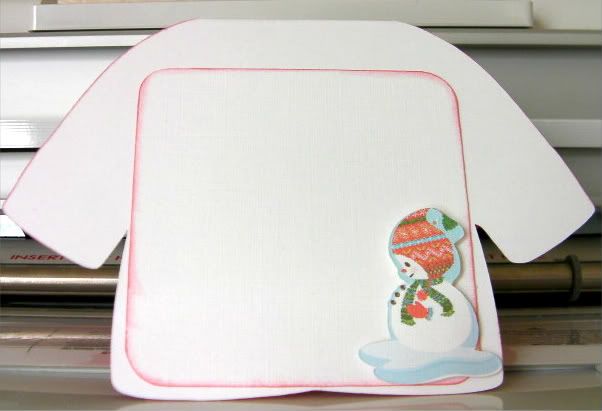
At this point, just add any fun embellishments you would like.  Super Super easy!!

So, for today's challenge....  create you own background/printed paper using your Imagine and then incorporate it into any project of your choice!  I hope you have fun with this one.

Thanks for stopping by today,  I hope you all have a fabulous weekend! :)
Lori

Wednesday, September 14, 2011

Use Your Stash Wednesday


Hi there! Nancy here with a project made using some of my surplus of crafting supplies. I admit, I am just about as bad about collecting vinyl as I am paper! I order most of my vinyl from expressionsvinyl.com. It is the same vinyl as our Cricut vinyl, but runs about $1.89 for a 12x24 of the regular indoor vinyl. Anyway, I have a ton of it and lots of scraps. I also collect frames, glassware, mirrors, etc. to use with my vinyl. I decided I would use the Word Collage Cartridge to make a changeable seasonal wall decoration. I used an 8x8 shadowbox frame that I had in my stash and lots of vinyl scraps. I cut the whole collage in black and then added the colored pieces to highlight. I plan on making an insert for every season. This particular one is cut at 7.5 inches square, but I will probably cut the rest at 7x7 so they don't go all the way to the edge. The background paper (another scrap), is cut at 8x8. I do apologize for the glare and/or shadow you see-I just couldn't get the perfect photo in the light I had. I think I will also add a removeable accent to the outside of the frame for each season. Probably use magnets to hold it on. Hope you like it.

Tuesday, September 13, 2011

Halloween Mini Card Series

There are 6 weeks left until Halloween and I have decided to post a card each week until Halloween, which is my favorite holiday (if you consider it a holiday). I am going to try and use things that are in my stash and to make theses cards without the use of my Cricut, although I doubt that will happen. LOL! I hope you enjoy my mini card series.

Card 1 (Very Simple)


Recipe:
Designer Paper- DCWV Ghost & Goblin Matstack
Stamps- All Hollow's Eve (Recollection) Elegant Witch for the spider (Martha Stewart)
2 orange Rhinestone from Studio 18 (dollar bin)

Monday, September 12, 2011

Challenge Yourself Monday

Hello, this is Rosa from Enjoying The Bug. For this week's Monday Challenge is to use a butterfly cut from any cart and create a card for someone, whether its for a birthday, just a thank you note, or even just because. With this being said below is what I came up with.....


To Make this card I used the following-
Cricut Imagine
Carts- Give A Hoot (Butterfly) and I used Imagine More Cards to fill it in.
Cardstock- Recollection and the new DCWV Harvest Matstack.
Stamp- TPC Studio "Thank You" set.


TBBM, George, Paper Lace & Gypsy


Friday, September 9, 2011

Imagine This Friday Challenge!!

Hello everyone, Adele here with this week's 
Imagine This Friday Challenge!!
Today I wanted to keep it simple and also for those that do not have an Imagine can  join in too.

My challenge for this week is to make use of any basic built in shape
(Non Imagine user's can use any shape they like)
I wanted to get a head start on some Christmas cards, so this is what I came up with ;)


By just using 3 circle shapes and a Snow Angel Image, quick and easy :)


I cut 2 plain circles at 4" and 5"
1 patterned circle at 4.5" (Snow Angel)
The image from Snow Angel was cut at 3"

First I added the patterned paper to the largest circle, 
scored through the centre then added the smallest circle (only adhering the bottom half to the base)
I also added a wax Christmas seal


So quick and easy to make, my next batch will have action wobbles for the Kiddies :)
I hope you can join in this challenge
Get creative but most of all
Have Fun !!


Hugs
Adele